Wiki, FAQ, how-to
Splice.me app is a Fiber Management System, it was designed to be the most easy and fast way to produce fiber splice diagrams. We believe you can tame it without any advice, as the interface is very intuitive. Anyway, we are here to help.
Working with worksheet (bedsheet)
Pages
Connections between cable ends
Copy, Paste and Move Pages
Print out / PDF / Save to SVG / XLSX
Other features
Trace fibers
Color cables
Page share
SETTING UP YOUR PROJECT
Click + to add a new project.
Project tile shows project name and its current stats: number of pages used, created and last modified dates.
WORKING WITH SPLICE SHEETS
Zoom in and out with +/- buttons on the right hand side or use Ctrl + mouse wheel up/down.
Setup page header
Fill the text fields of page header. First string is usually used for the node name, it can be a reduction of the address and/or rack/closure number, e.g. Fox Str #23. This field is displayed on the bedsheet to make navigation easier, and next to the cable ends showing the node names where these cables go to.
Address string and sheet description fields are not mandatory and are displayed only on the page header.
Add things to the sheet
You can add stuff to the splice sheet either in the left or the right coloumn.
Click the blue ‘+’ button and add
– cables
– your previously saved cables
– splitters
– user equipment
Cables
To create a cable end – click on the add button. You can create a cable end in 2 ways:
– select cable geometry (total fiber count, fiber count in module, color scheme)
– select cable type from user library
To delete a cable – right-click on cable and select delete.
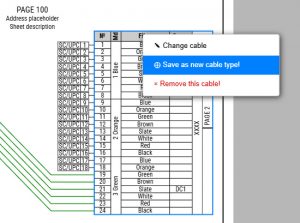
To change cable type or geometry – right-click on cable header and select different parameters. If this cable has been connected to another end on bedsheet, the other cable end will also change. If you reduce the fiber count of cable – you will lose some splices.
Saving a cable to user library
When you’ve created a cable and manually filled in its cable type, you can now right-click on it and select “Save as new cable type”, it will be saved in your user cable list. Press that blue plus button to add your saved cables to the worksheet in a single click.
There you can make changes to all saved cables – alter their geometry and text value of the “cable type”.
Splitters
To create a splitter – click on the add button. Select splitter geometry – number of inputs and outputs.
To delete a splitter – right-click on splitter header and select delete.
To change splitter geometry – right-click on splitter header and select different parameters.
Add user text to its body, use shift+enter for a new line of text.
User equipment
User equipment is literally a text box with connectors.
Add it and label it the way you want – you can enter some user teat into its’ body.
Use shift+enter for a new line of text. Apparently the number of lines is limited by the number of connectors.
Splices
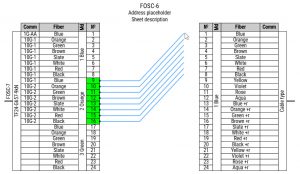
To create a single splice – click on a fiber in cable or splitter and drag it to another fiber. When a splice blinks green it means it is being saved/updated on server.
To create multiple splices either select fibers with mouse or Shift + click them, and drag them to another cable.
Click on splice vertices and drag them around to alter their geometry to reduce mess on the page.
You can always grab one or multiple splices, pull out of a cable and stick into other fibers. If you hold Ctrl while pulling out splices, and if you have already altered their geometry, geometry will be preserved.
If you need to make a straight connection between two very thick cables – there’s an automatic way.
Select both cables by clicking their titles while holding SHIFT, then hit ALT+SHIFT+C, all unoccupied fibers will connect.
To delete a splice:
– select it and press Backspace on keyboard or
– right-click it and select remove or
– simply drag it out of the cable, it will disappear
To delete multiple splices:
– select them and simply pull out of the cable, they will disappear
Propagate text data through connections
If you want some certain fibers throughout the network to be marked with text – fill in the Comm cells in cable (Comm means comment). These text fields will be propagating through cables when you make splices on pages and cable connections on bedsheet.
But please be attentive while making connections between cable ends on bedsheet – it is important which cable end you start from! Comments from the starting cable end will propagate further on.
Colorize fibers
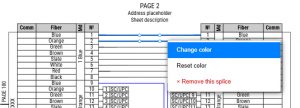
If you want to highlight some fibers in order to distinguish them one from another, select one or several splices, right click and select change color or click colorize in top menu, choose colour.
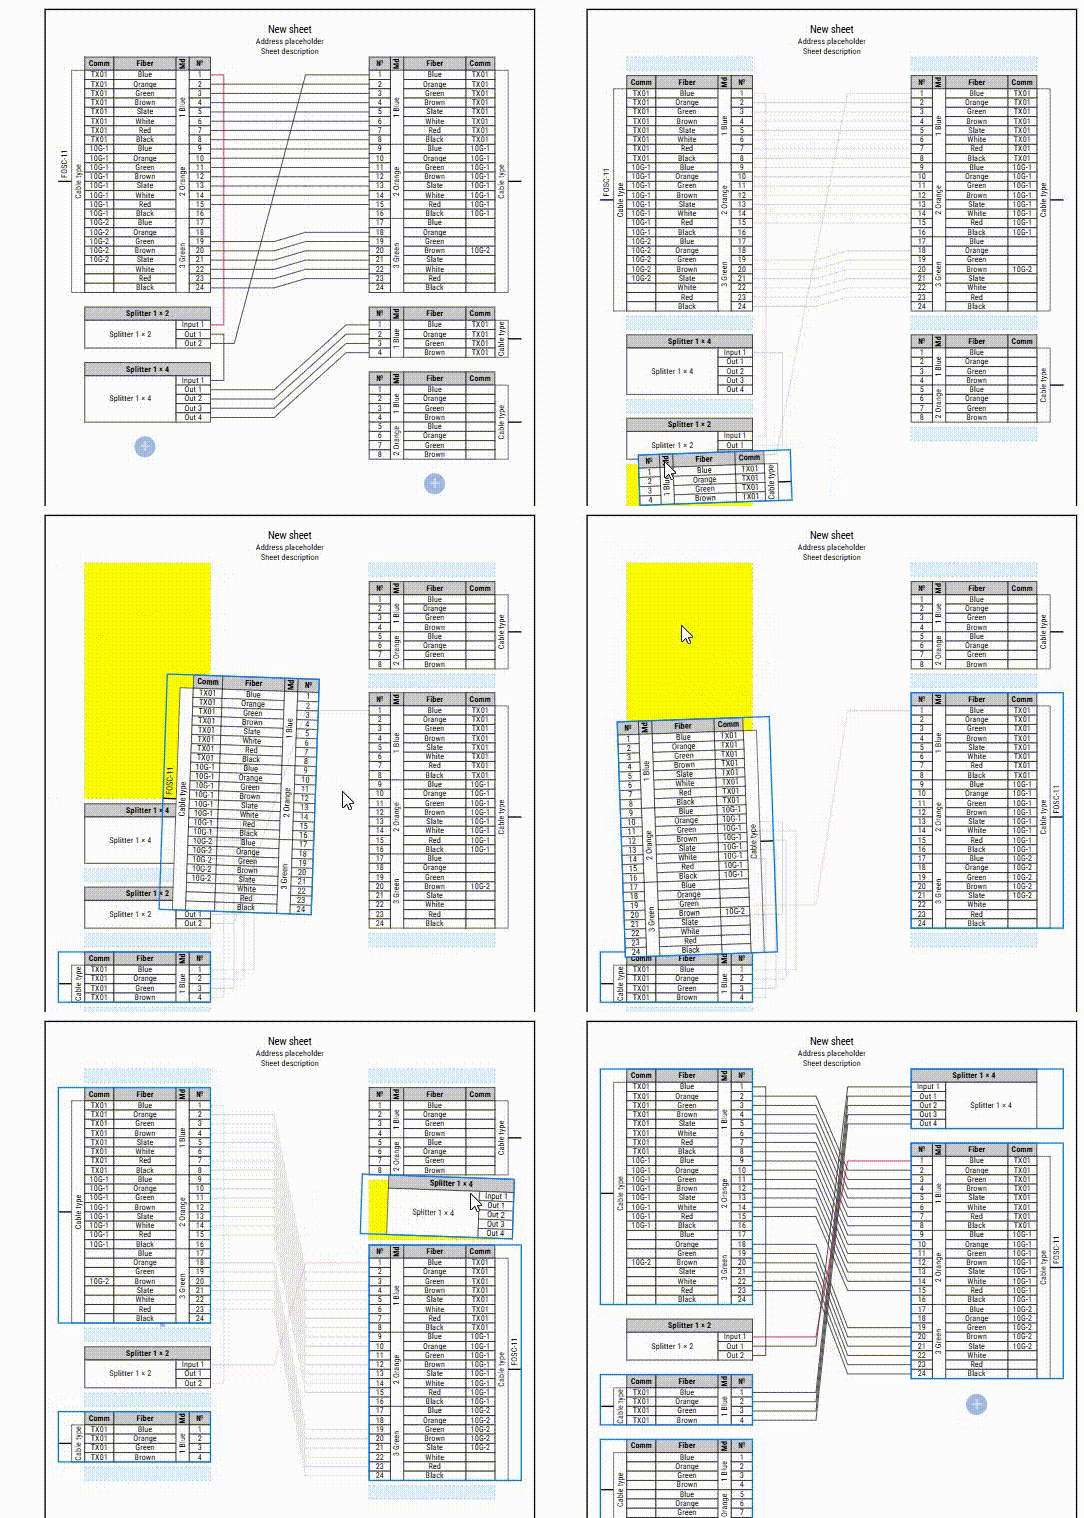
Drag cables around the page
Grab a cable (or splitter or user equipment) by its head and drag around – you’ll see that you can drop it in different places of the page. All splices will stay in place but will apparently lose any adjustments to their geometry.
Sockets
Select fiber cells in a cable and press “add socket” – a pre-selected default type sockets will be added. To select a single fiber cell in a cable – click it while holding Shift. The “default socket type” feature is needed in order to add sockets in 1 click, without asking you every time what type of socket you want to add.
WORKING WITH WORKSHEET (BEDSHEET)
Zoom in and out with +/- buttons on the right or use Ctrl + mouse wheel up/down.
Scroll left & right with Shift + mouse wheel up/down.
Pages
Click on a page to activate it.
Right click on a page and select Remove to remove a page. All data on a page will be deleted.
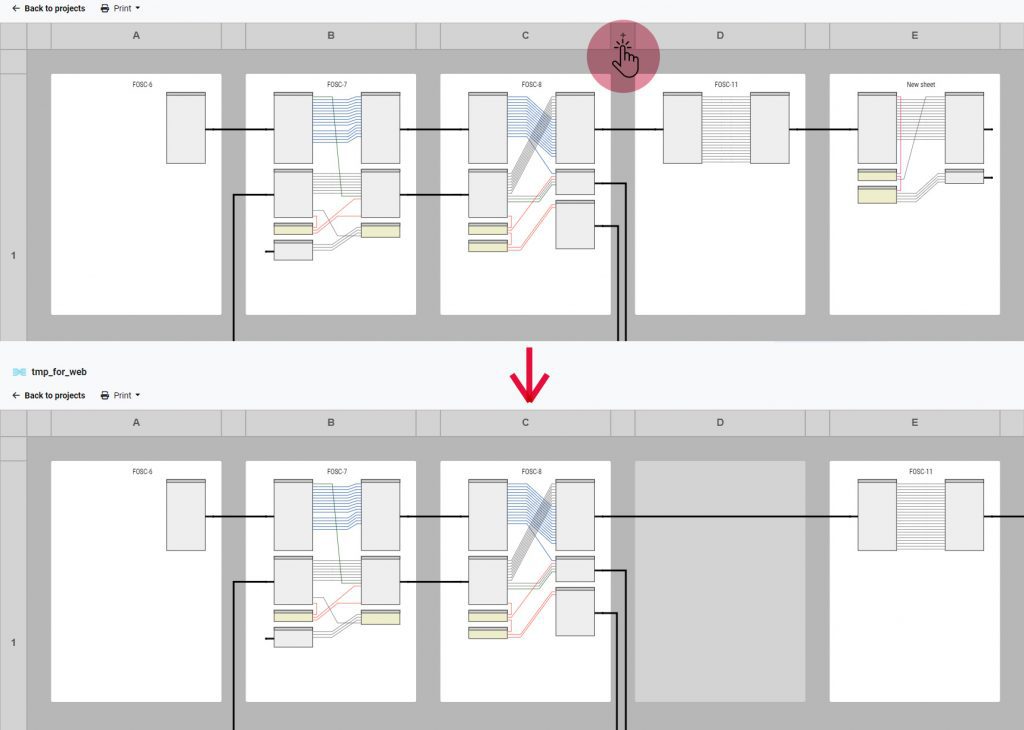
Click on + between rows or columns to add a row or column of pages.
Right click on row name or column name and select Remove to remove a row or column of pages.
Works as good as in MS Excel.
Connections between cable ends
While on bedsheet, click on a dot on a cable end, drag&drop it on another cable end, a connection will be established. Cables will have text showing the address of the other end of this cable, which will be taken from the corresponding page header. A connection won’t be established between cable ends that differ (either fiber count, or module count, or color code).
Alter connection’s geometry by dragging vertices around.
A connection won’t be established if the target cable is of a different type.
To remove a connection either:
– select it and press backspace on keyboard or
– right-click it and select remove or
– simply drag it out of the cable, it will disappear
!!! Be attentive while making connections between cable ends on bedsheet – it is important which cable end you start from! Comments from the starting cable end will propagate further on.
Copy, Paste and Move pages
While on bedsheet, right click on a page, click Copy to copy a page. Then you can click any unoccupied sheet placeholder to paste that page.
Same thing with moving a page – right click on a page, click Move, then click any unoccupied sheet placeholder to place that page there. The page will move and leave an unoccupied place after itself.
PRINT OUT / PDF / SAVE TO SVG / EXPORT TO XLSX
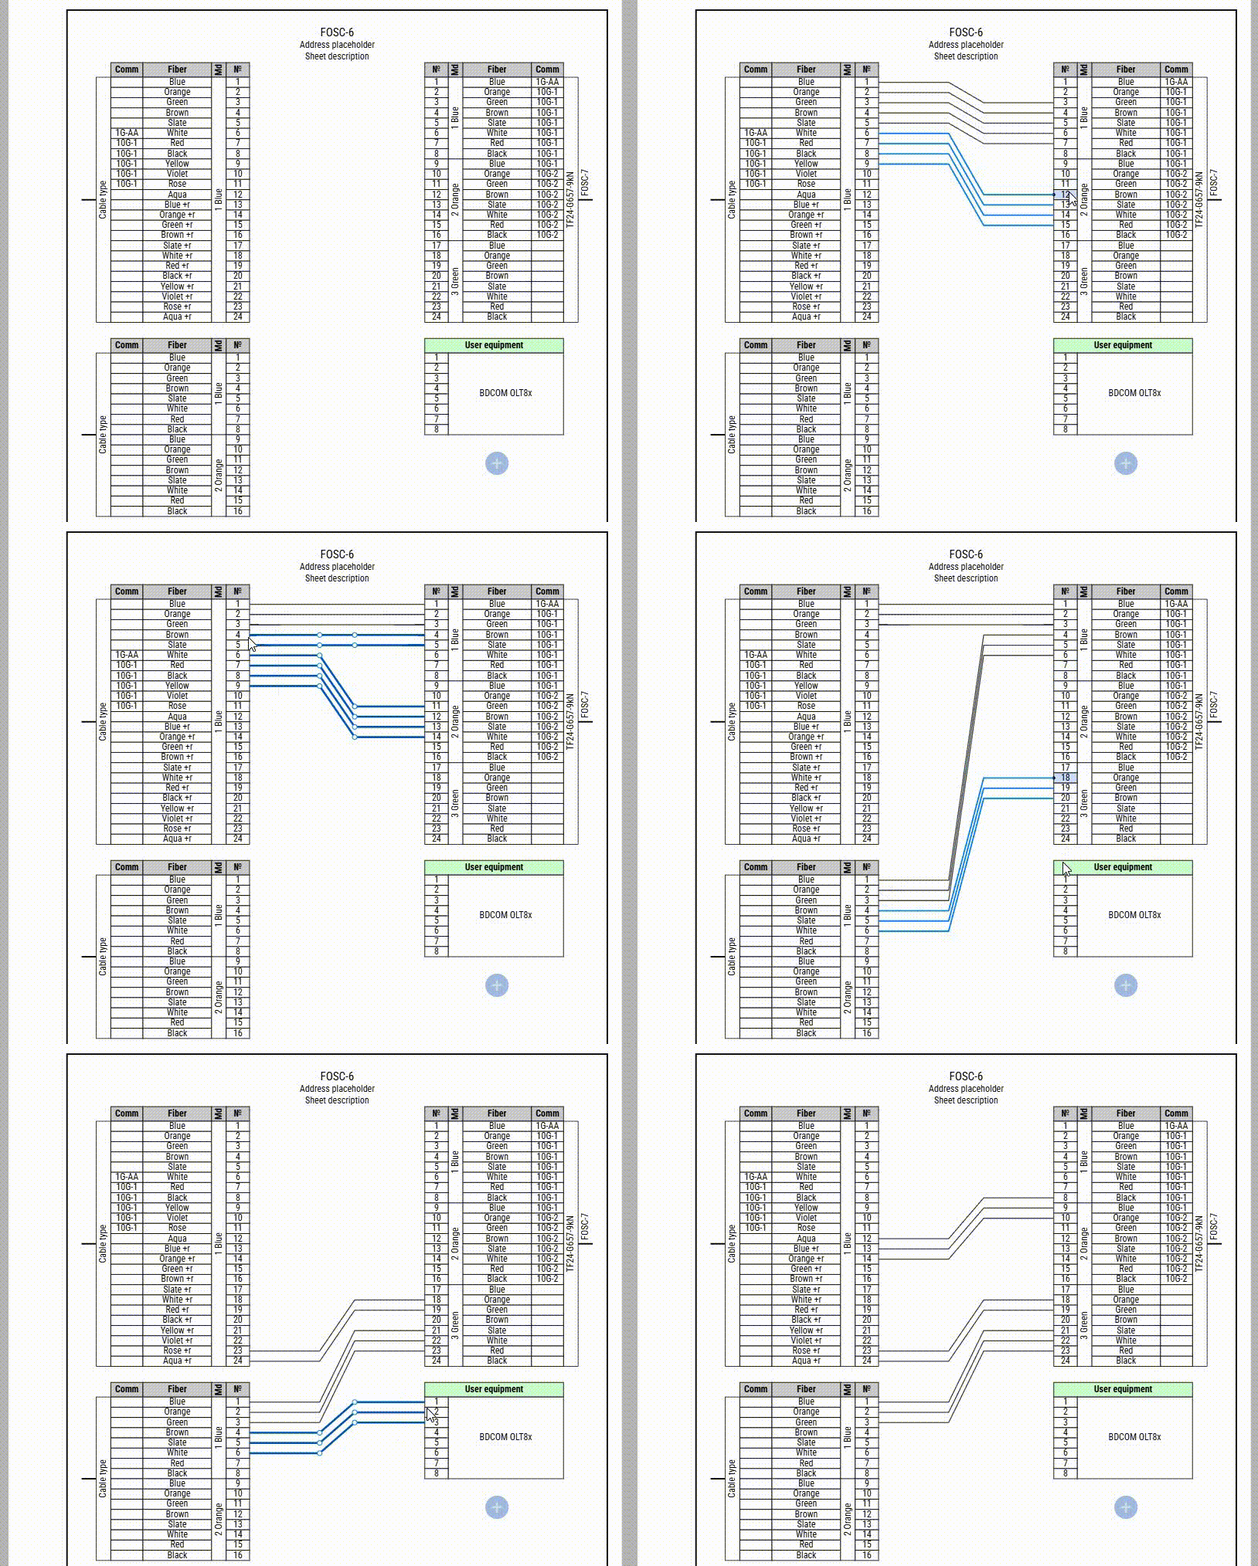
There are three different ways of printing fiber splice sheets (PDF output for example):
| Print separate page | Print several or all pages as separate pages | Print all pages as a single bedsheet |
 |  |  |
| Result: a PDF file with a single page | Result: a multipage PDF file with each diagram on separate page | Result: a PDF file with one huge page containing the whole project bedsheet |
 |  |  |
If you want to save a page or the whole project as SVG or XLSX – this option appears after you press print either for a page or the whole project.
This applies to ways 1 & 3 of printing. Apparently you can not save the project as SVG in the form of “separate sheets”, like shown in the middle section.
OTHER FEATURES
Trace fibers
Trace fiber paths end-to-end.
You can launch ‘Trace’ either from the page or from the bedsheet.
– On a page select a cable or a splitter by clicking on their header and click ‘Trace’. All of the corresponding fibers will be lit and stay lit until you click ‘Untrace’. The results will be seen on the current page, on the bedsheet and on all other affected pages.
– On the bedsheet select a connector between pages (representing a certain fiber cable) and click ‘Trace’. All of the fibers in that cable will be lit.
Color Cables
This button toggles between b/w diagrams and colored diagrams. The result is only seen on pages, not on the bedsheet.
The same button is present in the print out dialogue – so you can choose whether to print or export to SVG either b/w or colored diagrams.
Page Share
Unlike the feature of granting access to the whole project to your collegue, this feature is available both on a page and on the bedsheet.
Click ‘Share’ in the toolbar to create and open a short link to a certain page. The link will always show the actual state of the diagram, so you can alter this page as you will. This way you can integrate your diagrams with any software – spreadsheets, CRMs, network monitoring, etc.
PROJECT SHARING / COLLABORATIVE EDITING
While in your account, click 3 dots on a project tile, select Manage Access, input your collegue’s email, press Grant Access.
This project will appear in your collegue’s account.
Same way you can revoke access.
To remove a project form your account, that has been shared with you, select Reject Access in the same menu.


